Table of Contents
There’s something deeply satisfying about dialing in the perfect ignition timing on your project car. That moment when the engine’s idle smooths out, throttle response sharpens, and you know you’ve extracted every bit of performance from your tune-up—it’s what keeps hobbyist mechanics hooked on DIY automotive work. Yet many enthusiasts shy away from timing adjustments, assuming they need expensive professional-grade equipment to get it right. The truth is, effective timing lights have become surprisingly accessible, putting professional-level engine diagnostics within reach of weekend warriors.
While premium timing lights can cost hundreds of dollars, the market has evolved to offer capable units that won’t strain your tool budget. For hobbyists working on classic cars, daily drivers, or performance projects, understanding what features matter most helps you make a smart investment. This guide cuts through the technical jargon and marketing hype to show you exactly what to look for when shopping for an affordable timing light, how to use it effectively, and which capabilities are essential versus nice-to-have luxuries. Whether you’re tackling your first distributor adjustment or fine-tuning a carbureted performance build, you’ll learn how to choose a tool that delivers reliable results without breaking the bank.
Top 10 Timing Lights
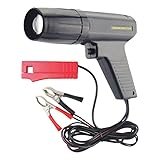

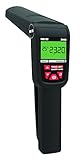


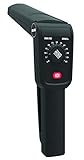


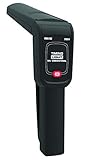
Detailed Product Reviews
Understanding Timing Lights and Their Importance
What Is a Timing Light and How Does It Work?
A timing light is essentially a stroboscopic flashlight that synchronizes with your engine’s ignition pulses. When you connect its inductive pickup to a spark plug wire, the tool detects each firing event and triggers a bright flash precisely when that cylinder fires. This strobe effect “freezes” the motion of the harmonic balancer’s timing marks as they spin, allowing you to read the engine’s ignition timing while it’s running. The science is straightforward—our eyes can’t track objects spinning at thousands of RPM, but a precisely timed flash makes those marks appear stationary against a reference pointer.
The basic components include the main housing with a xenon or LED bulb, an inductive clamp that wraps around a spark plug wire, power leads that connect to the battery, and either analog or digital controls. Budget models typically simplify the electronics while maintaining the core functionality. Understanding this fundamental operation helps you evaluate whether a particular feature is genuinely useful or just marketing fluff.
Why Ignition Timing Matters for Engine Performance
Ignition timing determines when the spark plug fires relative to the piston’s position in the compression stroke. Set it too early (advanced), and you risk detonation and engine damage. Set it too late (retarded), and you lose power, fuel economy, and risk overheating. The sweet spot varies based on engine speed, load, temperature, and fuel quality. Modern vehicles adjust timing electronically through computer control, but older carbureted engines and many performance applications still require manual adjustment.
Even minor timing errors can cause noticeable drivability issues. A few degrees off might manifest as sluggish acceleration, pinging under load, hard starting when hot, or excessive emissions. For hobbyists restoring classic cars or maintaining older daily drivers, verifying timing is as fundamental as checking oil levels. It’s one of the few adjustments that can transform an engine’s character without opening the hood for major surgery.
The Role of Timing Lights in DIY Automotive Repair
For the home mechanic, a timing light transforms timing adjustment from guesswork into precise measurement. Rather than relying on ear-tuning or trial-and-error, you can verify exactly where your timing sits at idle and see how it advances with RPM. This capability becomes crucial when installing aftermarket distributors, rebuilding engines, or diagnosing mysterious performance issues. A timing light also helps identify problems like timing chain stretch, slipped harmonic balancers, or faulty advance mechanisms.
The tool’s value extends beyond just setting initial timing. You can use it to check mechanical advance curve operation, verify vacuum advance function, and diagnose misfires by observing inconsistent flash patterns. For hobbyists building their diagnostic arsenal, it’s one of the most cost-effective ways to gain insight into engine operation. The learning curve is gentle, and the satisfaction of nailing perfect timing provides confidence for tackling more complex projects.
Types of Timing Lights Available
Xenon Timing Lights: The Traditional Choice
Xenon timing lights have been the industry standard for decades, using a xenon flash tube that produces an intensely bright, crisp flash. This brightness is their main advantage—xenon lights remain highly visible even in direct sunlight, which is crucial when you’re working outdoors or in bright shop lighting. The flash duration is extremely short, creating sharp timing mark images without blur.
However, xenon technology carries some drawbacks for budget-conscious buyers. The flash tubes require high voltage, making the internal electronics more complex and potentially less reliable over time. They also consume more power and can drain small batteries quickly. In sub-$50 models, you’ll often find older xenon designs that may lack modern refinements but still deliver the core functionality. The bulbs themselves can be fragile, and replacement parts might be difficult to source for discontinued models.
LED Timing Lights: Modern Efficiency
LED-based timing lights represent the newer generation, using arrays of high-output LEDs to create the strobe effect. These units draw significantly less power, run cooler, and offer virtually unlimited bulb life. The compact nature of LEDs allows for smaller, lighter housings that are easier to maneuver in tight engine bays. Many budget LED models now achieve brightness levels that rival xenon, though they may still struggle slightly in harsh midday sun.
The efficiency of LED technology makes battery-powered models more practical, eliminating the need to clip onto your vehicle’s battery terminals. This simplifies setup and reduces the risk of accidental short circuits. On the downside, some ultra-cheap LED lights use lower-quality LEDs that produce a dimmer flash or have inconsistent timing. The strobe effect might also appear slightly less crisp than xenon to some users. For most hobbyist applications, a quality LED timing light in the budget range offers the best balance of features and reliability.
Digital vs. Analog Display Options
Budget timing lights typically feature simple analog displays—a basic dial or switch for advance adjustment and maybe a few indicator lights. Analog controls are straightforward and rarely fail, which appeals to mechanics who prioritize durability over gadgets. You set your desired advance on the dial, and the light automatically adjusts its flash timing to show the new reference point on the balancer.
Digital displays, while less common under $50, are appearing more frequently in budget models. These might show RPM readings, voltage levels, or digital advance settings. The advantage is precision—you can dial in exact degrees rather than estimating from a dial. However, digital circuits add complexity and potential failure points. For hobbyists, a simple analog dial is often more practical and reliable. The key is ensuring the dial moves smoothly and holds its setting without slipping, which is a common issue in cheaper units.
Key Features to Consider in Budget Timing Lights
Brightness and Visibility in Daylight
The primary job of a timing light is to be seen, making brightness arguably the most critical specification. A dim flash forces you to work in shadows or wait for dusk, turning a five-minute job into a frustrating ordeal. Quality budget lights typically specify flash brightness in candela or effective range. Look for units that explicitly mention “daylight visible” or “sunlight readable” in their descriptions.
Xenon lights generally win the brightness battle, but modern LED arrays have closed the gap significantly. The reflector design also plays a huge role—a well-designed LED reflector can outperform a poorly designed xenon unit. When evaluating options, consider where you’ll do most of your timing work. If your garage has excellent lighting or you frequently work outside, prioritize brightness. For dimly lit garages, even a moderately bright light will suffice. Some budget models include a brightness boost mode that sacrifices battery life for extra visibility.
Compatibility with Different Ignition Systems
Not all timing lights work with all ignition systems, and this limitation often trips up hobbyists. Traditional inductive timing lights work perfectly with conventional distributor-based systems and most early electronic ignitions. However, they may struggle with some modern coil-on-plug (COP) systems or capacitive discharge ignitions that produce very short, high-energy sparks.
Budget lights typically focus on compatibility with common ignition types found in older vehicles—HEI, Duraspark, and standard points systems. If you’re working on newer vehicles or performance ignitions, verify the light can handle the specific system. Some budget models include a switch for “DIS” (distributorless ignition system) mode, which adjusts the sensitivity for coil pack systems. For COP systems, you might need an additional adapter that fits between the coil and plug, adding cost. The product description should clearly state which ignition types are supported.
Inductive Pickup Quality and Durability
The inductive clamp is the most handled and abused part of any timing light. This spring-loaded clip wraps around the spark plug wire and detects the magnetic pulse from each firing. In budget models, cheap pickups can fail in several ways: weak springs that won’t stay closed, brittle plastic that cracks in cold weather, or poor shielding that picks up electrical noise.
Look for pickups with robust springs and high-quality insulation on the cable where it enters the clamp. The hinge should feel solid, not flimsy. Some budget lights use interchangeable pickups, allowing replacement if damaged—a worthwhile feature if you frequently work on multiple vehicles. The cable length matters too; a longer cable gives you more flexibility in positioning the light, especially on larger engines or when you need to keep the unit away from hot exhaust components.
Power Source Options: Battery vs. Clamp-On
Budget timing lights typically draw power in one of two ways: direct connection to the vehicle’s 12V battery via alligator clips, or internal batteries (usually AA or 9V). Clamp-on models guarantee unlimited runtime but add two more connections you must make correctly. Reversing these leads can damage the unit, and the clips can spark if they touch each other accidentally.
Battery-powered models offer cleaner setup and portability, letting you time engines in salvage yards or remote locations. However, battery life varies dramatically. Xenon lights can drain a set of batteries in just a few hours of use, while LED models might last for months. Some budget units use proprietary rechargeable batteries that become useless when they eventually fail. For maximum flexibility, look for models that offer both options—battery power for convenience with optional clamp-on power for extended sessions.
Advance Timing Functionality
Advance timing features allow you to check total timing at higher RPM without revving the engine to dangerous levels. By dialing in a specific advance amount on the light, the flash timing shifts to show you where that advance degree appears on the balancer. This is invaluable for checking mechanical advance curves and ensuring your distributor’s advance mechanism works correctly.
In budget lights, this feature ranges from simple analog dials with 0-60 degree ranges to digital presets. The key is smooth, accurate adjustment that holds its setting. Cheap dials may have loose detents or inaccurate markings, making precise settings difficult. Some sub-$50 models omit advance features entirely, showing only base timing. For most hobbyist work on stock or mildly modified engines, a basic 0-60 degree dial covers your needs. Performance builds requiring precise curve mapping might justify stepping up to a more advanced unit.
Build Quality and Housing Material
The physical construction of a timing light directly impacts its lifespan in a hobbyist’s garage. Budget models typically use ABS plastic housings, which can range from surprisingly robust to alarmingly flimsy. Quality indicators include thick walls, smooth seam lines, and secure screw fastenings rather than snap-together plastic. The lens should be clear polycarbonate, not thin acrylic that cracks easily.
Weight can be a proxy for quality—overly light units often skimp on internal components or use minimal plastic. However, excessively heavy models become tiring to hold during extended tuning sessions. The grip area should have texture or rubber overmold to prevent slipping with oily hands. Check online reviews specifically mentioning durability after drops or years of use. While you can’t expect pro-grade metal housings under $50, solid plastic construction should survive normal shop mishaps.
What to Expect in Sub-$50 Timing Lights
Typical Capabilities at This Price Point
Timing lights in the under-$50 category deliver core functionality without frills. You can expect reliable base timing measurement on conventional ignition systems, adequate brightness for most garage environments, and basic advance adjustment up to 60 degrees. Most include both battery and clamp-on power options, though battery life varies significantly. Build quality will be functional but not luxurious—plastic housings, simple analog controls, and standard-length cables.
These units typically lack digital displays, RPM readouts, or programmable advance curves. They may not work reliably on some coil-on-plug systems without adapters. The included instructions are often minimal, assuming you have some mechanical knowledge. However, the essential strobe function works as well as expensive models—the flash timing accuracy is fundamentally the same. For periodic timing checks and basic distributor tuning, a budget light performs identically to its pricier counterparts.
Limitations and Trade-offs
The compromises in budget timing lights become apparent with heavy use. Brightness may be marginal in direct sunlight, making outdoor timing difficult. The inductive clamp might be less sensitive, requiring precise positioning on the plug wire. Advance dials can be imprecise, making fine adjustments challenging. Cable quality often suffers—thin insulation that cracks over time and weak strain reliefs where cables enter the housing.
Long-term durability is the biggest question mark. While a $200 professional light might last decades with daily shop use, a $40 unit could fail after a few years of occasional hobbyist use. Component quality is inconsistent—some users report years of flawless operation while others experience early failures. Warranty support is typically minimal, often just 90 days to one year. Battery compartments may have flimsy contacts that corrode or lose connection. Understanding these limitations helps set realistic expectations and encourages careful handling.
When Spending More Makes Sense
Certain situations justify moving beyond the budget tier. If you’re building a high-performance engine requiring precise timing curve mapping, professional-grade lights with digital RPM displays and programmable advance make the job significantly easier. Professional mechanics who use the tool daily will benefit from the durability and warranty support of premium brands. Working primarily on modern coil-on-plug systems often requires advanced inductive technology or specialized adapters that budget lights lack.
If you frequently tune engines in bright outdoor conditions, the superior brightness of high-end xenon lights becomes practical rather than luxurious. Similarly, if you need to document timing settings for customers or track performance changes precisely, digital displays and data recording features justify their cost. For most hobbyists, though, these scenarios are exceptions rather than rules. The key is honestly assessing your actual needs versus wants—if you’re timing a classic car twice a year, the budget option serves you perfectly.
How to Choose the Right Timing Light for Your Needs
Assessing Your Vehicle Fleet and Requirements
Start by inventorying the vehicles you actually work on. A hobbyist with a 1960s muscle car collection has vastly different needs than someone maintaining a fleet of 1990s daily drivers. Check each vehicle’s ignition type—points, electronic distributor, HEI, DIS, or COP. Note whether any have difficult-to-access timing marks or require checking advance curves. This reality check prevents buying more tool than necessary.
Consider your working environment too. Do you have a dimly lit garage where any flash will be visible, or do you work outdoors where brightness is paramount? How often will you realistically use the tool—weekly, monthly, or just for occasional major tune-ups? A $40 timing light used twice a year costs $20 per use over its lifespan, making even a short-lived unit economical. Conversely, if you’re the neighborhood tuning guru helping friends weekly, durability becomes more important than initial cost.
Determining Must-Have vs. Nice-to-Have Features
Create a prioritized feature list before shopping. Must-haves should include compatibility with your primary ignition systems, adequate brightness for your workspace, and reliable basic operation. Nice-to-haves might be digital displays, RPM readout, longer cables, or a protective carrying case. Advance timing functionality sits somewhere between—essential for performance tuning but optional for basic maintenance.
Be ruthless about eliminating features you’ll never use. That fancy timing light with Bluetooth connectivity and a smartphone app might sound cool, but if you’re just setting base timing on a stock engine, it’s wasted money and complexity. Similarly, don’t pay extra for COP compatibility if all your projects use traditional distributors. The goal is matching the tool to your real-world usage, not impressing fellow enthusiasts with specifications.
Reading Between the Lines of Product Specifications
Manufacturers often use vague or misleading specifications in budget product descriptions. “Bright xenon flash” means nothing without candela ratings or comparison context. “Works on most ignition systems” might exclude your specific vehicle. Look for specific, quantified claims—“60-degree advance range” is verifiable, while “wide advance adjustment” is marketing fluff.
Check the fine print on power requirements. Some battery-powered models claim “long battery life” but drain cells in just a few hours of use. Others specify “up to 40 hours” but only with premium lithium batteries in LED mode. Pay attention to warranty terms too—a 90-day warranty suggests the manufacturer expects failures, while a one-year warranty indicates more confidence. User reviews often reveal the truth behind specifications, particularly regarding durability and real-world brightness.
Using Your Timing Light Effectively
Step-by-Step Guide to Checking Static Timing
Begin by locating your engine’s timing marks—typically a pointer on the timing cover and degree marks on the harmonic balancer. Clean these thoroughly with brake cleaner and a wire brush; dirty marks are impossible to read. Connect the timing light’s power leads to the battery (positive first, then negative) and the inductive clamp to the #1 spark plug wire, ensuring the arrow points toward the plug. Start the engine and let it reach operating temperature.
Point the timing light at the marks and squeeze the trigger. The flash should illuminate stationary timing marks against the pointer. If the marks appear blurry, adjust the light’s position or clean the marks further. Read the number aligned with the pointer—that’s your current timing. Compare it to the specification on your vehicle’s emissions sticker or shop manual. To adjust, loosen the distributor hold-down bolt slightly and rotate the distributor while flashing the light. Snug the bolt and recheck, as the distributor can shift during tightening.
Understanding Timing Marks and Harmonic Balancers
Timing marks vary widely between engines. Some have simple TDC (top dead center) notches, while others display full degree scales from -20 to +40 degrees. The harmonic balancer itself can be a source of confusion—outer rings can slip on the rubber isolator, making the marks inaccurate. If you suspect balancer slippage, verify TDC manually using a piston stop tool.
Many engines have multiple pointers or scales for different purposes. You might see marks for base timing, total advance, and emissions testing specs. The service manual identifies which pointer to use—using the wrong one leads to incorrect settings. Some balancers have multiple rings of marks; ensure you’re reading the correct set. For engines with hidden marks, a small inspection mirror and flashlight during setup save frustration later.
Troubleshooting Common Reading Issues
If the timing light won’t flash, first check the inductive clamp orientation and connection. The clamp must fully close around the wire, and the arrow must point toward the spark plug. Verify power connections—reversed polarity often won’t damage the unit but prevents operation. Test the light on a different plug wire to isolate whether the issue is the light or that specific cylinder’s ignition.
Inconsistent flashing or dim flashes usually indicate a weak battery (in battery-powered models) or a failing inductive clamp. Try fresh batteries first, as this solves most issues. If the flash is bright but timing marks still appear to move, you might be seeing timing flutter from a worn distributor shaft or timing chain stretch. In this case, the timing light is actually diagnosing a mechanical problem. If advance readings seem impossible (like 50 degrees at idle), the harmonic balancer may have slipped, or you could be reading the wrong set of marks.
Safety Precautions During Use
Always wear safety glasses when working around a running engine—timing lights involve electrical connections near moving parts. Keep loose clothing, hair, and jewelry away from the fan and belts. The inductive clamp carries no high voltage, but the spark plug wire itself does; avoid touching it during operation. Ensure the timing light’s power leads can’t fall into the fan or onto hot exhaust manifolds.
Never disconnect the timing light while the engine is running. The inductive clamp can generate voltage spikes when opened, potentially damaging the unit or ignition components. When adjusting the distributor, use a insulated screwdriver and avoid leaning over the engine in case of backfire. Work in a well-ventilated area, as you’ll be running the engine for extended periods. If you smell fuel or see leaks, stop immediately and address the issue before proceeding.
Maintenance and Care for Longevity
Proper Storage Practices
Store your timing light in a dry environment, as moisture corrodes internal contacts and damages the inductive clamp’s cable. Many hobbyists toss the light in a toolbox drawer, but this stresses the cables and invites damage. Instead, loosely coil the cables without sharp kinks and place the unit in its original box or a padded case. Keep the inductive clamp slightly open during storage to prevent the spring from taking a set and losing tension.
Avoid extreme temperatures, which degrade plastic housings and battery contacts. If you live in a humid climate, toss a small silica gel packet in the storage box. For battery-powered models, remove batteries if you won’t use the tool for several months. This prevents corrosion from leaking cells, which is the most common cause of death for budget electronics. A few minutes of proper storage after each use can double the lifespan of a sub-$50 timing light.
Cable Management and Protection
The cables connecting the inductive clamp and power leads are the weakest links in any timing light. Avoid pulling on the cables themselves when disconnecting—always grip the connectors or clamp body. Never wrap cables tightly around the housing for storage; this creates stress points that eventually break internal conductors. Instead, use loose loops secured with Velcro straps.
Inspect cables regularly for cracks in the insulation, particularly where they enter the connectors. Apply dielectric grease to battery clip connections to prevent corrosion. If a cable shows signs of wear, reinforce it with heat-shrink tubing before it fails completely. Some hobbyists reinforce the cable entry points with flexible epoxy or silicone as soon as they buy the tool, preventing the most common failure mode. This proactive maintenance costs pennies but saves the tool from premature retirement.
Cleaning and Inspection Routine
After each use, wipe down the timing light housing with a clean shop towel to remove oil and grime. Pay special attention to the lens, as a film of oil diffuses the flash and reduces effective brightness. Use a plastic-safe cleaner—not ammonia-based glass cleaners which can cloud polycarbonate lenses. Inspect the inductive clamp’s jaws for cracks or loose hinge screws, tightening as needed.
Every few uses, check the battery contacts for corrosion. A pink eraser works well for cleaning light oxidation from contacts. Test the flash brightness against a wall in a dark room; if it seems dimmer than when new, fresh batteries might be needed even if the unit still triggers. For clamp-on power models, check the alligator clips for tight spring tension and clean contact surfaces. A quick functionality test before a critical job prevents frustration later.
When to Replace Your Timing Light
Even well-maintained timing lights eventually fail. The most common terminal failures are cracked inductive clamps that won’t stay closed, internal electronic component failure causing weak or inconsistent flashes, and damaged cables that aren’t economically repairable. If the flash becomes noticeably dimmer even with fresh batteries, the flash tube or LED driver circuit is likely failing. Intermittent operation that persists after cleaning contacts and checking connections indicates internal component degradation.
Consider replacement when repair costs exceed half the price of a new unit. For a $40 timing light, that threshold is low—if the inductive clamp breaks and a replacement costs $25, you’re better off buying a whole new unit with fresh warranty and updated features. However, don’t discard a timing light for minor issues. A loose wire at the battery clip can be resoldered in minutes, extending the tool’s life for years. The key is distinguishing between simple fixes and fundamental failures.
Common Mistakes Hobbyists Make
Misreading Flash Patterns
The most frequent error is assuming the timing mark should sit perfectly still. In reality, slight movement is normal as engine RPM fluctuates and the mechanical advance engages. What you’re looking for is the average position, not a frozen image. Beginners often chase this phantom stability, over-adjusting the distributor unnecessarily. Learn to read the “center” of the moving mark’s range.
Another mistake is misidentifying which mark is which. On balancers with multiple scales, it’s easy to read the wrong degree number. Always verify you’re using the correct pointer and scale before making adjustments. Some engines have timing marks on both the crankshaft pulley and the flywheel—ensure you’re checking the right location. The service manual’s diagram is your best friend here; don’t rely on memory or guesswork.
Incorrect Connections and Their Consequences
Reversing the power leads on a clamp-on timing light usually won’t cause permanent damage, but it prevents operation and can blow internal fuses. More seriously, connecting the inductive clamp backward (with the arrow pointing away from the plug) often results in no flash or extremely dim flashes. Some users then crank the advance dial trying to “fix” the reading, leading to massively incorrect timing settings.
The worst mistake is accidentally grounding the timing light’s positive lead to the engine block while it’s connected to the battery. This creates a direct short that can blow fuses, damage the light’s electronics, or in rare cases, melt wires. Always connect positive first, then negative, and ensure the leads can’t touch metal. Double-check connections before starting the engine, as vibration can shift poorly secured clips into dangerous positions.
Ignoring Environmental Factors
Ambient light, engine temperature, and electrical noise all affect timing light performance. Trying to read timing marks in harsh midday sun with a dim light is an exercise in frustration. Shade the area with cardboard or wait for better conditions. Cold engines give different timing readings than hot ones; always set timing at normal operating temperature as specified in the manual.
Electrical interference from poorly shielded plug wires or nearby power sources can cause erratic flashing. If the light flashes randomly even with a good connection, try routing its cables away from other wires and ignition components. Some engines with noisy ignition systems require a timing light with better noise rejection—an area where budget models sometimes struggle. Recognizing these environmental factors prevents misdiagnosis of timing light failure.
Alternatives and Complementary Tools
Timing Lights vs. Modern Scan Tools
Modern OBD-II scan tools can display ignition timing on computer-controlled vehicles, leading some hobbyists to skip buying a timing light. While scan tools excel at showing commanded timing and advance curves, they can’t verify that the physical timing matches the computer’s request. A timing light remains essential for confirming that timing marks align with actual engine position, particularly after distributor replacements or timing chain work.
Scan tools complement rather than replace timing lights. Use the scan tool to monitor timing advance during test drives and the timing light for initial setup and verification. For pre-OBD-II vehicles, the timing light is irreplaceable. The two tools together provide complete timing diagnostics—electronic confirmation of what the computer thinks is happening and physical verification of reality. Budget-conscious hobbyists should prioritize the timing light first, adding a basic scan tool later if they work on modern vehicles.
When to Use a Dwell Meter
Dwell meters, which measure the points’ closed time in older ignition systems, occasionally appear in budget tool discussions. For vehicles with points ignition, a dwell meter is actually more important than a timing light for basic tune-ups. Incorrect dwell affects timing advance and spark energy. However, dwell meters are useless on electronic ignitions, limiting their relevance for most hobbyists.
If you own classic cars with points distributors, consider a combination unit that includes both dwell and timing functions. These sometimes appear in the sub-$50 range and offer excellent value for specific applications. For everyone else, a dedicated timing light is the better investment. Modern electronic conversions for classic cars eliminate the need for dwell measurement entirely, making the timing light the universal tool across all your projects.
Building a Complete Timing Toolkit
A timing light alone doesn’t complete your ignition tuning arsenal. Add a quality timing tape for harmonic balancers without degree marks—these adhesive tapes provide precise markings for advance curve checking. A dial-back timing light is the premium alternative to timing tapes, but a tape costs under $10 and works with any timing light. Include a small inspection mirror on a telescoping handle for seeing hidden timing marks.
A remote starter switch proves invaluable when setting timing alone, allowing you to bump the engine to TDC without running back to the driver’s seat. For performance tuning, a simple vacuum gauge helps set timing for maximum manifold vacuum. A tachometer (standalone or part of a multimeter) provides RPM readings to correlate with timing advance. Together, these tools cost less than a single premium timing light but enable complete ignition system diagnostics and tuning.
Frequently Asked Questions
Can I use a budget timing light on modern vehicles with coil-on-plug systems?
Most sub-$50 timing lights struggle with coil-on-plug ignitions without additional adapters. The extremely short, high-voltage pulses in COP systems require sensitive inductive pickups that budget models typically lack. You’ll need a specialized COP probe that fits between the coil and spark plug, which often costs as much as the timing light itself. For occasional use, borrowing or renting a professional-grade light for COP vehicles makes more economic sense than buying a budget unit that can’t handle them.
What’s the difference between a timing light and a timing gun?
These terms describe the same tool—“timing gun” is simply an older colloquialism, while “timing light” is the modern standard term. Both refer to the stroboscopic device that flashes in sync with ignition pulses. Don’t be confused by marketing language; focus on the specifications and features rather than the name. Some manufacturers used to differentiate based on shape or grip style, but today the terms are interchangeable in the automotive world.
How accurate are sub-$50 timing lights compared to professional models?
For basic timing measurement, budget lights are equally accurate to professional units. The flash timing is electronically controlled and precise across all price ranges. Where professional models excel is in brightness, durability, and advanced features like digital displays. A $40 timing light will show you the same 12-degree timing reading as a $400 model; the difference is how easily you can see that reading in challenging conditions and how long the tool lasts under daily use. For occasional hobbyist use, accuracy is not a differentiating factor.
Do I need a timing light with advance adjustment?
For most basic maintenance—setting initial timing to factory specs—advance adjustment is optional. You can rev the engine and watch the marks move to verify advance is working. However, if you’re tuning performance engines, checking total advance, or diagnosing advance mechanism issues, the feature becomes nearly essential. It allows you to measure advance at specific RPM without risking engine damage from over-revving. Given that many budget models include basic advance dials, it’s worth seeking one out for the added diagnostic capability.
Why won’t my timing light trigger or flash?
First, verify the inductive clamp is fully closed around the plug wire with the arrow pointing toward the spark plug. Check power connections—reversed polarity prevents operation on most models. Test with fresh batteries, as weak cells cause dim or inconsistent flashes. If using clamp-on power, ensure both alligator clips make solid contact with clean battery terminals. Try the clamp on a different plug wire to isolate whether the issue is the light or that specific cylinder’s ignition. If none of these steps work, the inductive pickup or internal electronics may have failed.
Can a timing light damage my vehicle’s ignition system?
Properly used, timing lights cannot damage ignition systems. The inductive clamp works by sensing magnetic fields, not by making electrical contact. However, improper connections can cause issues. Reversing power leads might blow fuses in the timing light but won’t harm the vehicle. The real risk comes from accidentally shorting the battery leads to ground or each other, which can blow vehicle fuses or melt wires. Always connect positive first, then negative, and ensure leads are secured away from moving parts and hot surfaces.
How do I know if my timing marks are accurate?
Timing marks can lie if the harmonic balancer’s outer ring has slipped on its rubber isolator or if the pointer has been bent. Verify TDC manually by removing the #1 spark plug, inserting a piston stop tool, and slowly rotating the engine by hand to find exact top dead center. Compare this physical TDC position to the timing marks. If they don’t align, the balancer needs replacement. Never trust old timing marks on unknown engines—always verify TDC before making critical timing adjustments.
Is it worth buying a used timing light to save money?
Used timing lights can be excellent values, particularly older professional xenon models that were overbuilt for durability. However, inspect carefully before buying. Test the flash brightness, check all cables for cracks, and verify the inductive clamp springs closed firmly. Ask the seller to demonstrate it working on a running engine if possible. Avoid units with damaged housings, corroded battery compartments, or intermittent operation. The savings must be substantial—under $30—to justify the risk of no warranty and unknown history.
What’s the best way to test if a timing light is working correctly?
Test on a known good engine with verified timing. Connect the light and check that the timing mark appears stable and readable. Advance the engine and watch for smooth mark movement. Use the advance dial to shift the reference point and verify it changes the apparent timing position. Check that the flash is consistent without random misses. For a quick functionality test, point the light at a wall in a dark room and pull the trigger; you should see a bright, steady flash. If you have access to a second timing light, compare readings on the same engine—they should match within a degree.
Do timing lights work on diesel engines?
Standard timing lights designed for gasoline engines do not work on diesel engines because diesels lack spark plugs and ignition coils. Diesel timing requires specialized tools that detect injection pulses or use cylinder pressure sensors. Some advanced (and expensive) timing lights include diesel adapters, but these are well beyond the budget category. If you work on diesel engines, you’ll need a dedicated diesel timing tool, which operates on completely different principles than ignition timing lights.
See Also
- 10 Game-Changing Battery-Powered Timing Lights for Mobile Mechanics in 2026
- 10 Best Inductive Timing Lights for DIY Mechanics This Year
- 10 Best Timing Lights for Home Mechanics in 2026
- 10 Best Battery-Powered Timing Lights for On-the-Go Mechanics in 2026
- The 10 Ultimate Best AC-Powered Timing Lights for Garage Mechanics in 2026