Table of Contents
Nothing ruins a freshly detailed car quite like the telltale swirl of holograms dancing across the paint in direct sunlight. These frustrating micro-scratches, often caused by improper polishing techniques or the wrong equipment, can turn your dream finish into a nightmare of endless re-work. Whether you’re a weekend warrior tackling your daily driver or a seasoned professional aiming for that flawless concours shine, understanding how to eliminate and prevent these visual artifacts is the difference between amateur results and show-stopping perfection.
The secret weapon in this battle isn’t just skill—it’s precision control. Variable speed polishers have revolutionized paint correction by giving users the ability to match machine speed to paint hardness, product type, and cutting requirements in real-time. This comprehensive guide explores everything you need to know about selecting and using these versatile tools to achieve hologram-free finishes, focusing on the features that matter most and the techniques that separate the pros from the hobbyists.
Top 10 Variable Speed Polishers
Detailed Product Reviews
1. DEWALT Buffer Polisher, 7-in-9-in, 12 amp, Variable Speed Dial 0-3,500 RPM’s, Soft Start Corded Car Buffer (DWP849X)

Overview: The DEWALT DWP849X is a professional-grade corded rotary polisher built for serious automotive detailing and heavy-duty applications. Delivering 12 amps of power with speeds from 0-3,500 RPM, this tool features a robust all-ball-bearing construction and precision-cut steel gears designed for sustained commercial use and years of reliable service.
What Makes It Stand Out: The soft-start feature prevents aggressive jolting on startup, while the dual variable speed control—both trigger and dial—offers precise RPM management for different tasks. The replaceable wool ingestion shield is a standout feature that extends tool life by preventing pad fibers from damaging internal components. The rubber overmoulded gearcase provides superior grip and heat insulation during extended polishing sessions.
Value for Money: Priced in the premium tier, the DWP849X justifies its cost through exceptional durability and professional features that cheaper polishers lack. While budget options may fail within a year, this DEWALT model typically lasts for years of daily use, making it more economical for professionals who depend on reliability and consistent performance.
Strengths and Weaknesses:
- Strengths: Professional build quality; soft start prevents splatter; excellent speed control; replaceable wool shield; trusted brand support and service network.
- Weaknesses: Heavy at 8+ pounds; corded design limits mobility; premium price may deter hobbyists; requires separate purchase of pads and backing plates.
Bottom Line: Ideal for professional detailers and serious enthusiasts who prioritize durability and performance over portability. The DWP849X is a long-term investment that delivers consistent, high-quality results with proper maintenance.
2. GEVEELIFE Buffer Polisher, 6 Inch/7 Inch 1600W Rotary Car Buffer Polisher Waxer, 7 Variable Speed 1000-3500 RPM, Detachable Handle for Car, Boat Sanding, Polishing, Waxing

Overview: The GEVEELIFE 1600W polisher positions itself as a versatile, user-friendly option for automotive enthusiasts seeking professional results without professional pricing. This rotary buffer handles everything from oxidation removal to final wax application across multiple surfaces with impressive capability for its class.
What Makes It Stand Out: The built-in constant-power control board maintains consistent performance during extended sessions, preventing the frustrating power drop-off common in budget polishers. Weighing only 4.5 pounds with dual detachable handles, it adapts to various grip preferences and reduces user fatigue significantly. The seven-speed range (1000-3500 RPM) provides flexibility for delicate to aggressive correction work.
Value for Money: Exceptional value for beginners and intermediate users. The comprehensive kit includes multiple foam pads, wool pads, and sandpapers—accessories that would cost $50+ separately. While not matching DEWALT’s industrial durability, it offers 80% of the performance at 40% of the price, making it accessible for most DIYers and hobbyists.
Strengths and Weaknesses:
- Strengths: Lightweight and maneuverable; complete accessory package; constant-power technology; ergonomic handle options; wide application range.
- Weaknesses: Brand lacks long-term track record; M14 thread limits pad compatibility; plastic components may wear faster; not suitable for heavy commercial use.
Bottom Line: A smart choice for DIY detailers and weekend warriors. The GEVEELIFE kit provides everything needed to start polishing immediately, offering impressive performance and value for occasional to moderate use.
3. DEWALT 20V MAX* XR Cordless Polisher, Rotary, Variable Speed, 7-Inch, 180 mm, Tool Only (DCM849B)
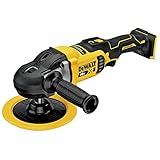
Overview: The DEWALT DCM849B brings cordless convenience to professional-grade polishing, freeing users from cord management without sacrificing performance. This 20V MAX XR tool features a brushless motor optimized for efficiency and extended runtime in mobile detailing scenarios and on-the-go applications where power outlets are scarce.
What Makes It Stand Out: The cordless design eliminates the primary frustration of tethered polishers—managing cables around vehicles. The brushless motor delivers consistent power while maximizing battery life. Dual variable speed control via trigger and dial provides the same precision as corded models, with a no-load speed range of 800-2200 RPM suitable for most automotive correction and finishing applications.
Value for Money: As a tool-only offering, the true cost includes batteries and charger, potentially adding $150-200 for newcomers to the DEWALT ecosystem. For existing 20V MAX users, it’s an excellent value proposition. The premium over corded models buys unparalleled mobility and reduced setup time for mobile operations and quick jobs.
Strengths and Weaknesses:
- Strengths: Ultimate portability; no cord management; brushless efficiency; professional build quality; excellent speed control.
- Weaknesses: Limited runtime on batteries; lower maximum RPM than corded counterparts; substantial investment for battery system; not ideal for all-day commercial use without multiple batteries.
Bottom Line: Perfect for mobile detailers and DEWALT battery system owners. The DCM849B trades absolute power for freedom of movement, making it ideal for spot correction and jobs where outlet access is problematic or inconvenient.
4. BUCKTOOL 1HP VFD Motor 8-Inch Variable Speed Bench Buffer Polisher, 900-3600 RPM One Button Speed Setting Powerful Benchtop Polisher, Extended Polishing Shaft for Jewelry, Metal Power Bench Grinders
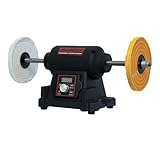
Overview: The BUCKTOOL benchtop polisher serves a different market entirely—jewelers, metalworkers, and craftsmen requiring precision stationary polishing. This 1HP VFD-equipped machine delivers variable speeds from 900-3600 RPM with exceptional stability for detailed work on small parts, jewelry, and metal fabrications that require finesse and control.
What Makes It Stand Out: The integrated VFD motor with one-button speed memory is revolutionary at this price point, recalling your last setting after power cycles automatically. The balanced rotor design minimizes vibration to levels rivaling industrial units costing twice as much. An extended polishing shaft accommodates larger workpieces, while the cast iron base eliminates movement during aggressive buffing and polishing operations.
Value for Money: Outstanding value for specialized applications. Comparable bench polishers with VFD control typically run $400+, making this an accessible entry into professional-grade stationary polishing. The inclusion of both coarse and fine wheels adds immediate utility and saves additional expense for users.
Strengths and Weaknesses:
- Strengths: Superior stability; VFD with memory function; minimal vibration; extended shaft versatility; powerful 1HP motor; excellent for precision work.
- Weaknesses: Not suitable for automotive detailing; occupies permanent workspace; limited to small parts; lacks portability; no integrated dust collection system.
Bottom Line: An exceptional choice for jewelers, machinists, and metal fabricators. The BUCKTOOL bench polisher delivers industrial features at a consumer price point, but automotive detailers should look elsewhere for handheld solutions.
5. LDHTHOPI Buffer Polisher, 1600W 7 Inch/6 Inch Rotary Buffer Polisher Waxer, 7 Variable Speed 1000-3500 RPM, Detachable Handle for Car, Boat Sanding, Polishing, Waxing

Overview: The LDHTHOPI 1600W polisher enters the crowded budget-friendly market with an accessory-heavy approach, targeting cost-conscious DIYers who want maximum versatility from a single purchase. This rotary buffer promises professional results across vehicles, boats, and household surfaces through its comprehensive seven-pad system and adaptable design features.
What Makes It Stand Out: The seven distinct pad types provide specialized solutions for every correction stage, from heavy cutting to fine finishing—a level of inclusion rarely seen at this price point. Three grip configurations (direct, D-handle, side handle) accommodate different user preferences and working angles effectively. The seven-speed range covers most automotive detailing scenarios adequately for beginners and intermediate users alike, offering good flexibility.
Value for Money: Compelling value proposition with extensive accessories, but the manufacturer’s 15-minute continuous use warning raises durability concerns. While pads alone justify much of the price, potential overheating issues suggest this is designed for intermittent use rather than sustained projects requiring consistent operation and reliability over long periods. For occasional use, the value remains strong.
Strengths and Weaknesses:
- Strengths: Seven specialized pads included; versatile grip options; lightweight design; multi-surface capability; competitive pricing for beginners.
- Weaknesses: Mandatory cooldown periods limit productivity; unknown brand reliability; plastic construction concerns; unclear warranty support; may lack long-term durability under heavy use.
Bottom Line: Suitable for occasional users and beginners on tight budgets. The LDHTHOPI offers impressive accessories and features, but the overheating warning suggests investing more in a proven brand for regular or heavy-duty professional use.
6. Milwaukee 2438-22 M12 Variable Speed Polisher/Sander – Cp/Cp Kit

Overview: The Milwaukee 2438-22 M12 Variable Speed Polisher/Sander represents the brand’s entry into compact cordless finishing tools. Operating on Milwaukee’s ubiquitous M12 battery platform, this tool combines polishing and sanding capabilities in a lightweight, ergonomic package designed for precision work and spot corrections rather than heavy-duty applications.
What Makes It Stand Out: This tool’s primary distinction lies in its cordless freedom within the M12 ecosystem, allowing users who already own Milwaukee batteries to add versatile finishing capabilities without additional charger investment. The dual-function design transitions between polishing and sanding modes, making it ideal for automotive detailers, woodworkers, and metal fabricators tackling intricate areas where bulkier corded tools prove unwieldy. Its compact form factor excels at navigating tight contours and vertical surfaces.
Value for Money: As a premium Milwaukee kit, this commands a higher price than entry-level corded alternatives. However, for existing M12 users, the tool-only value proposition strengthens significantly. The durability and warranty support justify the investment for professionals requiring portable precision, though DIY users might find comparable corded options at half the price.
Strengths and Weaknesses: Strengths include exceptional portability, M12 system compatibility, robust construction, and user-friendly controls. The compact size provides excellent maneuverability for detail work. Weaknesses involve limited power output suitable only for light to medium tasks, finite battery runtime requiring spare batteries for extended use, and a smaller polishing pad diameter that increases labor time on large surfaces.
Bottom Line: Perfect for professionals already invested in Milwaukee’s M12 platform who need a portable, precision finishing tool for detail work. For heavy-correction jobs or occasional users, a more powerful corded alternative offers better value.
7. WEN 948 10 Amp Variable Speed Polisher with Digital Readout, 7"
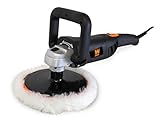
Overview: The WEN 948 delivers corded power and precision control in an affordable 7-inch polisher package. With its 10-amp motor and digital speed display, this tool targets DIY enthusiasts and entry-level detailers seeking professional features without premium pricing. The included accessories and dual-function capability provide immediate out-of-box utility for automotive, marine, and household applications.
What Makes It Stand Out: The standout feature is undoubtedly the onboard digital readout, typically reserved for tools costing twice as much, providing precise RPM verification from 1500-3500 RPM in 500-RPM increments. The included woolen fleece bonnet, auxiliary handle, and hook-and-loop pad system offer exceptional value. Its ability to transform into a sander by swapping pads extends functionality across multiple projects, from paint correction to rust removal.
Value for Money: Outstanding value proposition. Competing polishers with digital displays often exceed $150, while the WEN 948 frequently sells under $80. The 10-amp motor delivers sufficient power for most consumer applications, and the comprehensive accessory bundle eliminates immediate additional purchases. For occasional to moderate use, it outperforms its price bracket significantly.
Strengths and Weaknesses: Strengths include the digital RPM display, robust motor power, versatile dual-function design, and generous included accessories. The incremental speed control simplifies dialing in optimal settings. Weaknesses involve potential long-term durability concerns typical of budget brands, possible vibration at higher speeds, and a learning curve for beginners unfamiliar with variable-speed controls.
Bottom Line: An exceptional choice for budget-conscious DIYers and hobbyists wanting premium features. While not built for daily professional use, it delivers performance and features that punch far above its price point.
8. Milwaukee 2738-20 M18 18-Volt Fuel Lithium-Ion Brushless Cordless 7 inch Variable Speed Polisher (Tool-Only)
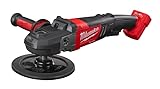
Overview: Milwaukee’s 2738-20 M18 FUEL polisher brings true corded performance to a cordless platform. This 7-inch variable speed tool leverages brushless motor technology and Milwaukee’s high-output batteries to deliver sustained power for demanding automotive and marine applications. Sold tool-only, it integrates seamlessly into existing M18 ecosystems while providing full-size pad capacity professionals require.
What Makes It Stand Out: The revolutionary aspect is achieving genuine corded-equivalent power without the cord, enabling unrestricted movement around vehicles and boats. The brushless motor maximizes efficiency and lifespan while maintaining consistent speed under load. Its 7-inch pad capacity matches traditional pneumatic and electric polishers, making it a direct replacement rather than a compact compromise. The M18 FUEL architecture ensures compatibility with over 200 tools on the same battery platform.
Value for Money: As a premium tool-only option, value depends entirely on existing M18 battery investment. For M18 users, it eliminates cord management hassles at approximately 60% the cost of a comparable corded polisher plus extension cords. New users must factor in battery and charger costs, pushing total investment near $400. Professional detailers will recoup costs through labor efficiency, while occasional users should consider corded alternatives.
Strengths and Weaknesses: Strengths include cord-free mobility, professional-grade power output, brushless motor durability, and full-size 7-inch capacity. The ergonomic design reduces fatigue during extended sessions. Weaknesses encompass premium pricing, substantial weight with high-capacity batteries, limited runtime requiring multiple batteries for all-day use, and potential torque steer for novices.
Bottom Line: A game-changer for professional detailers and serious hobbyists already invested in Milwaukee’s M18 system. The cordless convenience justifies the premium, but newcomers should weigh total ecosystem costs carefully.
9. Dual Speed Bench Buffer Polisher 1.8/3.1A, 8 inch Jewelry Buffer Polisher Machine, 1725/3450 RPM Power Bench Polisher with 2 cotton Wheels for Jewelry, Metal, Wood, Jade, Knife, Plastic
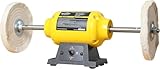
Overview: This bench-mounted buffer polisher serves craftsmen working with jewelry, knives, metal, and wood. Featuring dual 8-inch cotton wheels and a two-speed brushless induction motor, it provides stationary polishing power for small to medium-sized items. The cast iron base and extended shafts accommodate various workpieces while maintaining stability during precision operations.
What Makes It Stand Out: The dual-wheel configuration doubles productivity by allowing two different polishing compounds simultaneously, eliminating constant buff changes. The brushless induction motor operates quietly with minimal sparking, crucial for indoor workshops. Dual speeds (1725/3450 RPM) cater to both delicate polishing and aggressive buffing. The extended, ball-bearing-supported shafts provide clearance for larger items like knife blades or woodturning projects, a thoughtful design element rarely seen in budget bench polishers.
Value for Money: Exceptional value for dedicated hobbyists and small shop owners. Comparable bench polishers from established brands cost 50-100% more while offering similar specifications. The included cotton wheels, stable base, and two-year warranty eliminate immediate additional expenses. For jewelry makers, knifemakers, and woodworkers, it pays for itself by reducing manual sanding time and achieving superior finishes.
Strengths and Weaknesses: Strengths include rock-solid stability, dual-wheel efficiency, quiet brushless motor operation, versatile speed options, and comprehensive material compatibility. The predrilled mounting holes simplify permanent installation. Weaknesses involve limited portability, fixed location constraints, insufficient power for large industrial parts, and generic brand recognition raising potential long-term parts availability concerns.
Bottom Line: An outstanding dedicated workstation tool for craftsmen prioritizing precision over portability. Ideal for jewelry makers, knifemakers, and hobbyists wanting professional bench polishing capabilities without industrial-grade pricing.
10. PORTER-CABLE Buffer Polisher, Car Polisher for Car Detailing, 6-Inch, Orbital, Variable Speed (7424XP)

Overview: The PORTER-CABLE 7424XP stands as the industry-standard random orbital polisher, trusted by professional detailers and enthusiasts for over a decade. This 6-inch tool employs a 4.5-amp motor with electronic variable speed control (2,500-6,800 orbits per minute) to deliver swirl-free finishes on automotive paint. Its proven design balances cutting ability with safety, making it the go-to recommendation for paint correction newcomers and veterans alike.
What Makes It Stand Out: The random orbit action prevents the paint burns and holograms common with rotary polishers while still achieving impressive defect removal. Its widespread adoption has created an enormous ecosystem of compatible pads, backing plates, and accessories. The electronic speed control maintains consistent RPM under load, and the proprietary counterbalance system minimizes vibration. The tool’s durability is legendary, with many units operating flawlessly after years of professional use.
Value for Money: This polisher hits the sweet spot of performance, reliability, and affordability. Priced competitively in the $100-130 range, it outlasts cheaper alternatives and avoids the $300+ cost of premium European brands. The extensive aftermarket support means users can customize the tool for any task without proprietary limitations. For anyone serious about car detailing, it’s an investment that pays dividends through consistent, high-quality results and exceptional longevity.
Strengths and Weaknesses: Strengths include foolproof random orbit operation, proven long-term reliability, massive accessory compatibility, ergonomic design, and consistent electronic speed control. It’s gentle enough for novices yet capable enough for professionals. Weaknesses involve less cutting power than rotary tools for heavy correction, AC-only operation limiting mobility, and the 6-inch pad size requiring more passes on large vehicles compared to 7- or 8-inch alternatives.
Bottom Line: The definitive choice for automotive paint correction. Whether you’re a weekend warrior or professional detailer, the 7424XP delivers unmatched reliability and results. It’s the benchmark all others are measured against.
Understanding Holograms and Paint Correction
What Are Paint Holograms?
Paint holograms, also known as buffer trails or swirl marks, are microscopic scratches in your vehicle’s clear coat that create a prismatic effect when light hits them at certain angles. Unlike traditional swirl marks from washing, holograms typically appear as uniform, wavy patterns that follow the path of your polisher. They occur when abrasive particles or pad edges create consistent micro-marring in the paint surface. These defects become particularly visible under LED lighting or direct sun, appearing to move across the panel as you shift your viewing angle—hence the “hologram” name.
The severity of holograms ranges from barely visible hazing to deep, obvious trails that obscure paint clarity. Modern clear coats, especially those on luxury and performance vehicles, are harder and more susceptible to showing these defects because their dense molecular structure reflects light more precisely. Understanding this phenomenon is crucial because it informs every decision you make during the correction process, from tool selection to final finishing techniques.
How Holograms Form During Polishing
Holograms typically emerge from three primary sources: aggressive pad and compound combinations, excessive machine speed, and improper technique. When you run a polisher at high speeds with a cutting pad, the abrasive particles can create consistent micro-scratches that align with the tool’s rotation pattern. This is especially true with rotary polishers, which spin on a single axis and can quickly generate heat and friction.
Even dual-action polishers can create holograms if used incorrectly. Running at too high an OPM (orbits per minute) with insufficient lubrication from your polish compound causes the pad to skip across the surface rather than glide smoothly. This skipping action creates uneven abrasion patterns. Additionally, using too much downward pressure or working too quickly across the panel prevents the abrasives from breaking down properly, leaving behind a trail of unfinished scratches that appear as holograms.
The Science Behind Paint Correction
Paint correction is essentially controlled abrasion—the process of removing microscopic layers of clear coat to level the surface and eliminate defects. Each polishing session removes approximately 0.1 to 0.3 microns of clear coat, which sounds minimal but requires precision. Variable speed control allows you to manage this removal rate by adjusting how quickly the abrasives interact with the paint.
The key principle is matching cutting speed to abrasive type. Heavy cutting compounds contain larger, more aggressive abrasives that require lower speeds (1,500-2,500 OPM) to prevent micro-marring. Finishing polishes use micro-fine abrasives that work best at higher speeds (4,000-6,000 OPM) to maximize gloss. Without variable speed capability, you’re forced to use a one-size-fits-all approach that inevitably creates compromises—and often, holograms.
Why Variable Speed Matters
Precision Control for Different Paint Types
Not all automotive paint is created equal. Japanese imports often feature softer clear coats that correct easily but hologram at the slightest provocation. German luxury vehicles typically use ceramic-infused hard coats that resist cutting. American muscle cars fall somewhere in between. Variable speed polishers let you tailor your approach to each specific paint system.
For soft paints, you’ll spend most of your time in the lower speed ranges, letting the abrasives do the work without generating excessive friction. Hard paints require higher speeds to activate the abrasives effectively. This adaptability means one tool can handle everything from a 1990s single-stage enamel to a modern Tesla multi-coat finish. The ability to fine-tune speed in 500 OPM increments gives you surgical precision that fixed-speed machines simply cannot match.
Heat Management and Paint Safety
Heat is the enemy of paint correction. Excessive temperatures can cause clear coat to soften, leading to unpredictable cutting, pad glazing, and yes—holograms. Variable speed control is your primary defense against heat buildup. By reducing speed, you decrease friction and allow the polish compound to act as a coolant and lubricant rather than just an abrasive carrier.
Professional detailers often “pulse” their speed—starting low to spread product, bumping up for cutting, then dropping down for finishing passes. This temperature modulation prevents the pad from overheating and maintains consistent performance throughout a long correction session. Electronic speed control systems maintain this selected speed under load, ensuring you don’t accidentally ramp up speed when pressing into a curve or body line.
Adapting to Compound and Polish Requirements
Modern polishing products are engineered for specific speed ranges to maximize their abrasive technology. Ceramic-infused compounds, for instance, require higher speeds to activate their diminishing abrasives properly. Traditional SMAT (Super Micro Abrasive Technology) polishes work best at moderate speeds where the abrasives can break down gradually.
A variable speed polisher acts as the conductor for this chemical orchestra. Speed too low, and your compound just smears without cutting. Speed too high, and you risk breaking down the abrasives before they can finish refining the surface. The sweet spot varies by product, and having the ability to dial in exactly what your compound needs separates flawless finishes from mediocre results.
Types of Variable Speed Polishers
Rotary Polishers: Power and Precision
Rotary polishers feature a direct-drive motor that spins the backing plate on a single axis, typically ranging from 800 to 3,500 RPM. This direct motion provides maximum cutting power and is the go-to choice for heavy defect removal on hard paints. The variable speed dial allows you to start low for spreading product, ramp up for cutting, and reduce speed for finishing work.
However, rotary polishers have the steepest learning curve. Their single-axis rotation generates significant heat and can create severe holograms if mishandled. The key is using the variable speed to maintain pad rotation without generating excessive friction. Professional detailers often use rotary machines for initial correction, then switch to dual-action tools for refining to eliminate any potential holograms. For beginners, rotary polishers should be approached with caution and extensive practice on test panels.
Dual Action (DA) Polishers: Safety and Versatility
Dual action polishers combine rotation and oscillation—the backing plate spins while also orbiting around a central point. This random orbital motion prevents heat buildup and makes hologram creation nearly impossible when used correctly. Variable speed DA polishers typically range from 2,500 to 6,800 OPM, giving you tremendous flexibility.
The beauty of DA machines lies in their safety margin. If you press too hard or use too much speed, the orbital action stalls rather than damaging the paint. This makes them ideal for enthusiasts and professionals alike. Modern DA polishers with electronic speed control maintain consistent orbital action under load, ensuring even correction across the entire panel. For hologram prevention, DA polishers are the undisputed champions for final finishing passes.
Forced Rotation Dual Action Polishers
Forced rotation DA polishers merge the best of both worlds. They maintain the orbital action of a DA while adding positive drive rotation like a rotary. This means they continue spinning even under pressure, providing more cutting power than a free-spinning DA while retaining the safety benefits of orbital motion. Variable speed control is critical here, as these tools can generate significant correction power.
Speed settings on forced rotation machines typically range from 2,000 to 5,000 OPM. The key is using lower speeds for spreading and finishing, medium speeds for general correction, and only resorting to higher speeds when working on extremely hard paints or severe defects. These tools excel at removing deeper scratches that would stall a standard DA, while still being gentle enough for final finishing without hologram risk.
Long-Throw Orbital Polishers
Long-throw polishers are the newest evolution in DA technology, featuring extended orbital throws of 15mm, 21mm, or even 25mm compared to the standard 8mm. This larger throw covers more area per pass and provides faster correction with less heat. Variable speed control becomes even more important with these machines because their increased throw generates more kinetic energy.
Speed ranges typically match standard DA polishers, but the effective cutting power is significantly higher at equivalent settings. For hologram prevention, long-throw machines excel at spreading product evenly and maintaining pad rotation without excessive pressure. The larger pad movement helps prevent the skipping action that causes micro-marring, making them particularly effective for achieving swirl-free finishes on large, flat panels.
Key Features to Evaluate
Motor Power and Efficiency
Motor power, measured in amps for corded tools and volts for cordless, directly impacts your polisher’s ability to maintain speed under pressure. A 7-amp motor might struggle on curved panels or when using aggressive pads, causing speed drop-off that leads to uneven correction. Professional-grade tools typically feature 10-amp or higher motors that deliver consistent performance.
Look for brushless motors in cordless models—they provide better efficiency, longer runtime, and more consistent torque. For corded polishers, electronic feedback systems that adjust power delivery based on load are invaluable. This technology prevents bogging down when you encounter resistance, ensuring the pad maintains optimal cutting speed throughout each pass.
Electronic Speed Control Systems
Basic variable speed polishers use rheostat dials that simply reduce voltage to the motor. Advanced models feature electronic speed control that maintains your selected speed regardless of pressure or pad type. This is crucial for hologram prevention because inconsistent speed creates inconsistent abrasion patterns.
Premium electronic systems offer soft-start functionality, gradually ramping up speed when you pull the trigger to prevent product sling. They also include overload protection that prevents motor damage if you push too hard. When evaluating polishers, test the speed control by pressing down on the pad while running—you should hear the motor compensate and maintain consistent RPMs or OPMs.
Ergonomic Design and Weight Distribution
You’ll be holding your polisher for hours, often at awkward angles reaching across roof panels or contorting around mirrors. A poorly balanced tool causes fatigue, which leads to sloppy technique and holograms. Look for polishers with weight distributed evenly between the head and handle, preventing wrist strain.
The grip design matters significantly. Soft-grip overmold handles reduce vibration transmission, while adjustable side handles let you customize your hold for different panel positions. Some premium models feature multiple handle positions or even detachable handles for tight spaces. A well-balanced polisher should feel like an extension of your arm, not a wrestling match.
Vibration Reduction Technology
Excessive vibration doesn’t just cause fatigue—it creates micro-vibrations in your hand that translate to inconsistent pad contact. This uneven contact is a primary cause of holograms, especially during finishing stages. High-quality polishers use counterbalance systems and precision-machined components to minimize vibration.
Test vibration levels by running the polisher at medium speed without a pad. Your hand should feel smooth operation, not buzzing or shaking. Some manufacturers publish vibration ratings in meters per second squared (m/s²). Lower numbers indicate smoother operation. For professional use, look for ratings under 2.5 m/s² to ensure comfortable all-day use without compromising finish quality.
Power Source: Corded vs. Cordless
Corded polishers provide unlimited runtime and consistent power delivery, making them ideal for extensive correction jobs. Look for 25-foot or longer cords with sturdy strain relief to prevent disconnections. The trade-off is managing the cord around the vehicle, which requires technique adjustments to avoid dragging it across fresh paint.
Cordless polishers offer unparalleled freedom of movement, especially valuable when working on roof panels or in tight garages. Modern battery technology provides 45-60 minutes of runtime per charge, sufficient for most panels. However, voltage sag as the battery depletes can affect speed consistency. For hologram prevention, ensure your cordless model features battery management systems that maintain consistent power output until complete depletion.
Speed Settings and Their Applications
Low-Speed Range (1,000-2,000 OPM/RPM)
The low-speed range is your foundation for hologram-free work. Use these settings for spreading polish evenly across the panel, allowing the product to warm up and the abrasives to begin their work gently. This range is also ideal for working on soft paints, vintage single-stage finishes, or when using aggressive compounds on fresh paint that might still be curing.
For final finishing passes with ultra-fine polishes, low speeds help the abrasives break down completely, creating maximum gloss without risking micro-marring. Many professionals finish every job with a slow-speed pass using a finishing polish and soft foam pad to ensure absolute clarity. This final step removes any potential holograms that might have formed during earlier correction stages.
Medium-Speed Range (2,000-4,000 OPM/RPM)
This is your workhorse range for most paint correction tasks. Medium speeds activate diminishing abrasives effectively, allowing them to cut initially and then refine as they break down. For dual-action polishers, this range provides optimal orbital action without generating excessive heat. It’s the sweet spot for removing moderate swirls, water spots, and light scratches while maintaining paint safety.
When working with one-step polish and sealant products, medium speeds ensure the abrasives correct while the sealant components properly bond to the paint. The key is maintaining consistent arm speed and pressure—let the machine’s orbital action do the work rather than forcing it. This range typically provides the best balance of correction speed and finish quality for daily drivers and well-maintained vehicles.
High-Speed Range (4,000-6,000+ OPM/RPM)
Reserve high speeds for specific situations: severe defect removal on hard paints, working with ceramic-infused compounds, or final jeweling passes with micro-fine polishes. The increased kinetic energy helps abrasives cut more efficiently but also generates more heat and requires greater skill to control. For hologram prevention, high speeds should be used cautiously and typically only with DA polishers where the orbital action provides a safety net.
When using high speeds, work in smaller sections and monitor pad temperature frequently. A pad that’s too hot becomes stiff and abrasive, creating exactly the defects you’re trying to eliminate. Many detailers use infrared thermometers to keep pad temperatures below 120°F. If you feel excessive heat through the backing plate, immediately reduce speed and allow the panel to cool.
Finding the Sweet Spot for Each Task
The perfect speed isn’t just about the numbers—it’s about reading how the polish is breaking down and how the pad is interacting with the paint. Start with manufacturer recommendations for your specific product, then adjust based on real-time feedback. If the polish is drying too quickly, reduce speed. If you’re not seeing correction after several passes, increase speed incrementally.
Develop a systematic approach: begin at low speed for product spread, increase to your working speed for correction, then drop back to low for the final refining passes. This speed cycling prevents heat buildup and ensures each stage of the abrasive process occurs under optimal conditions. Keep a log of what speeds work best with specific paint and product combinations to build your personal reference guide.
Pad Selection for Hologram-Free Results
Foam Pad Densities and Their Uses
Foam pads are categorized by their cell structure and density, which directly impacts cutting ability and finish quality. Coarse, open-cell foams (often colored yellow or orange) provide aggressive cutting for heavy defects but require careful speed control to prevent holograms. Medium-density foams (white or green) offer balanced correction and finishing capabilities. Dense, closed-cell foams (black or blue) are pure finishing pads that refine gloss and remove micro-marring.
The key is progressing through pad densities as you refine the finish. Never jump from a cutting pad directly to a finishing pad—use a medium pad as an intermediary step. This staged approach ensures each level of defect is properly addressed before moving to the next refinement stage. Match your pad density to your speed setting: coarse pads at lower speeds, finishing pads at higher speeds.
Microfiber vs. Foam Pads
Microfiber pads have revolutionized paint correction by offering cutting power comparable to wool with the safety of foam. The thousands of tiny fibers create multiple cutting edges that work efficiently at lower speeds, reducing heat and hologram risk. They’re particularly effective for one-step corrections where you need to remove moderate defects while leaving a high-gloss finish.
Foam pads remain superior for final finishing work. Their uniform structure provides even pressure distribution and excellent polish retention. For hologram prevention, many detailers use microfiber pads for initial correction at moderate speeds, then switch to foam for final refining passes. The combination leverages the strengths of both materials while minimizing their weaknesses.
Wool Pads for Heavy Correction
Wool pads provide the most aggressive cutting capability, making them ideal for severely neglected or heavily oxidized paint. However, they also pose the highest hologram risk due to their coarse fibers and heat generation. When using wool, keep speeds low (1,000-1,800 RPM for rotary, 2,000-3,000 OPM for forced rotation DA) and work in very small sections.
Always follow wool pad work with multiple foam pad refining stages. The holograms wool creates are often too severe to remove in one step. Plan on at least two subsequent foam pad passes—one with a medium-cut foam and final polish, then another with a finishing foam and ultra-fine polish. This multi-stage approach is non-negotiable when working with wool if you want a hologram-free finish.
Pad Size and Polisher Throw Compatibility
Pad size must match your polisher’s throw (orbital distance) for optimal performance. Using a 6-inch pad on a short-throw machine creates excessive edge speed and uneven pressure distribution, leading to holograms around the pad perimeter. Conversely, a small pad on a long-throw polisher wastes the machine’s potential and creates inefficient correction patterns.
Standard DA polishers with 8mm throws work best with 5- to 6-inch pads. Long-throw machines (15mm+) perform optimally with 5.5- to 6.5-inch pads, distributing the increased orbital energy across a larger surface area. For tight areas, use 3- to 4-inch pads on appropriate backing plates, but be aware that smaller pads concentrate force and require even more careful speed control to prevent micro-marring.
Essential Accessories
Backing Plates: Importance of Quality
The backing plate is the critical interface between your polisher and pad. A wobbly or imbalanced backing plate transfers vibration directly to the paint, creating holograms. Look for precision-machined plates with strong hook-and-loop material that maintains grip even when hot. Flexible backing plates conform to curved panels but can cause uneven pressure—opt for slightly rigid plates for flatter surfaces.
Weight matters too. Heavy backing plates increase motor load and vibration, while ultra-light plates may lack durability. The sweet spot is typically 4-6 ounces for a 5-inch plate. Ensure the plate’s maximum RPM rating exceeds your polisher’s top speed to prevent catastrophic failure. Some premium plates feature venting holes that improve air flow, keeping pads cooler during extended use.
Extension Cords for Corded Models
Using inadequate extension cords causes voltage drop, which leads to inconsistent speed control—the exact opposite of what you need for hologram prevention. For polishers drawing 10 amps or more, use 12-gauge cords for runs up to 50 feet, and 10-gauge for longer distances. Never use multiple cords daisy-chained together.
Look for cords with lighted ends to confirm power delivery and heavy-duty strain relief at both connections. Keep cords organized with Velcro ties to prevent tripping hazards and protect them from chemical overspray. A dedicated, high-quality extension cord is a small investment that ensures your polisher’s speed control system receives consistent power, translating to consistent finish quality.
Dust Extraction Systems
Polishing generates fine dust from spent abrasives and paint residue that settles back onto the panel, creating new defects. While not common on consumer polishers, some professional models feature dust extraction ports that connect to shop vacuums. This keeps the work area clean and prevents contamination during multi-stage corrections.
If your polisher lacks built-in extraction, position a vacuum hose near your work area, pointing away from the panel to create negative air pressure. Change pads frequently during heavy correction to prevent buildup of spent abrasives that can cause holograms. A clean work environment is just as important as proper technique for achieving flawless finishes.
Pad Cleaning and Maintenance Tools
Dirty pads are hologram factories. Spent polish, paint residue, and environmental contaminants accumulate in pad pores, creating uneven abrasive distribution. Pad cleaning brushes used during polishing help fluff fibers and remove debris, maintaining consistent performance. Compressed air blow guns quickly clear dust between passes.
For deep cleaning, pad washers that spin pads in a water bath remove embedded contaminants without damaging foam structure. Always dry pads completely before use—moisture trapped in pad cores creates inconsistent polish performance and can cause marring. Rotate through multiple pads of each type during a job, allowing used pads to cool and release spent product while you work with fresh ones.
Proper Technique for Hologram Prevention
The Three-Pass Rule
Never expect perfection in a single pass. The three-pass rule ensures systematic defect removal: first pass spreads product and initiates cutting, second pass provides primary correction with broken-down abrasives, third pass refines the finish. Each pass uses the same product and pad but at progressively lower speeds—high for spread, medium for correction, low for refining.
This approach allows abrasives to work through their entire diminishing cycle. The first pass at higher speed activates the abrasives and begins defect removal. As you continue, the abrasives break down into smaller particles that refine the surface. The final low-speed pass ensures complete abrasive breakdown and maximum gloss. Skipping passes or changing speed randomly interrupts this cycle, leaving behind partially worked scratches that appear as holograms.
Arm Speed and Pressure Control
Your arm movement should be slow and deliberate—approximately 1-2 inches per second. Moving too fast doesn’t give abrasives time to work, forcing you to increase speed and pressure, which creates holograms. Apply only enough pressure to keep the pad flat against the panel, typically 5-10 pounds for DA polishers, slightly more for rotary work.
Maintain consistent pressure throughout each pass, adjusting only to keep the pad flat on curved surfaces. Let the machine’s weight do most of the work. If you find yourself pressing hard to see results, you’re using the wrong pad, product, or speed setting. Hard pressure creates heat and uneven pad compression, both prime causes of hologram formation. Practice on a test panel until you can maintain steady pressure without thinking about it.
Working in Small Sections
Divide panels into 2x2 foot sections for systematic correction. This prevents polish from drying out before you’ve properly worked it and allows you to focus on maintaining consistent technique. Complete all three passes on one section before moving to the next, ensuring you don’t miss spots or create uneven correction patterns.
Use painter’s tape to mark section boundaries initially until you develop a consistent pattern. Overlap each section by about 50% to prevent harsh transition lines. On complex panels with multiple curves, reduce section size to 1x1 foot to maintain pad contact and consistent pressure. Small sections also make it easier to monitor your progress and adjust speed or technique before defects become severe.
Overlap Patterns for Even Results
Apply polish in an “X” pattern across your section, then work it using cross-hatch patterns—horizontal passes followed by vertical passes. This ensures even product distribution and prevents the directional marring that creates holograms. Each subsequent pass should overlap the previous by approximately 50%, similar to mowing a lawn.
For final finishing passes, switch to a circular pattern with 75% overlap, working at low speed. This randomizes any remaining micro-marring and creates a uniform gloss. The key is consistency—abrupt changes in direction or skipping areas creates uneven abrasion that shows up as holograms under inspection lighting. Develop a systematic approach and stick to it for every panel.
Safety Considerations
Electrical Safety for High-Powered Tools
Polishers draw significant current and operate in environments with water and chemicals. Always use GFCI-protected outlets or adapters, especially when working outdoors. Inspect cords for damage before each use—frayed cords are electrocution and fire hazards. Never bypass safety features like trigger locks or overload protection.
When changing pads or backing plates, always unplug corded polishers or remove batteries from cordless models. Accidental trigger activation with a wrench on the spindle can cause serious injury. Keep your work area dry, and if you must polish in humid conditions, use a ground fault interrupter and wear rubber-soled shoes. A safe work environment ensures you can focus on technique rather than hazards.
Respiratory Protection from Dust
Polishing dust contains fine abrasive particles, paint residue, and chemical carriers that shouldn’t be inhaled. Even water-based polishes create airborne particulates when they dry and become airborne. Use N95 or better respirators, especially during heavy correction stages or when working on older vehicles with potentially hazardous paint formulations.
Ensure your respirator fits properly and change filters regularly. If you can smell polish through the mask, the filters are spent. For professionals polishing daily, consider powered air-purifying respirators (PAPRs) that provide filtered air and reduce breathing resistance. Your lungs are more important than any paint finish—protect them accordingly.
Skin Protection and Chemical Safety
Polish compounds contain abrasives, solvents, and chemical carriers that can irritate skin and cause long-term dermatitis with repeated exposure. Wear nitrile gloves rated for chemical resistance—standard latex gloves degrade quickly when exposed to polishing oils. Long sleeves protect arms from splatter and dust.
If polish contacts your skin, wash immediately with soap and water. Avoid using solvents or thinners for cleanup, as they strip protective oils from your skin and can increase chemical absorption. Keep a bottle of hand cleaner and a towel in your workspace for immediate cleanup. Chemical burns from aggressive compounds are rare but possible—respect the products you’re working with.
Workspace Ventilation Requirements
Polishing generates heat, chemical vapors, and dust that require adequate ventilation. Work in spaces with active air exchange—open garage doors with fans creating cross-ventilation, or professional spray booths with filtered air systems. Avoid polishing in completely enclosed spaces without airflow, as vapor concentration can reach unhealthy levels.
Position fans to blow across your work area, not directly at the panel, to prevent dust contamination. If you experience headaches, dizziness, or eye irritation, immediately increase ventilation or use a respirator with organic vapor cartridges. Your workspace should have a slight breeze you can feel but not strong enough to blow dust onto wet polish.
Maintenance and Care
Cleaning Your Polisher After Each Use
Polish residue migrates into vents, switches, and motor housings, causing premature wear and electrical issues. After each use, wipe down the entire polisher with a clean microfiber cloth dampened with isopropyl alcohol. Pay special attention to the spindle area where polish accumulates and hardens.
Remove the backing plate and clean the spindle threads with a brush to prevent seizing. Blow compressed air through cooling vents to remove dust from the motor and brushes. For cordless models, clean battery contacts with a pencil eraser to ensure good electrical connection. This 5-minute routine extends tool life and ensures consistent performance.
Brush Replacement and Motor Care
Carbon brushes in universal motors wear over time, causing performance drop-off and potential motor damage. Check brushes every 50 hours of use, replacing them when worn to less than 1/4 inch. Many polishers have external brush caps for easy replacement—take advantage of this feature rather than waiting for failure.
Listen for changes in motor sound. A struggling motor or burning smell indicates brush wear or bearing issues. Address these immediately to prevent catastrophic failure that could damage your polisher and potentially mar the vehicle you’re working on. Keep spare brush sets on hand so maintenance doesn’t interrupt your workflow.
Storage Best Practices
Store polishers in clean, dry environments away from temperature extremes. Moisture causes corrosion on internal components, while heat degrades electronic speed control circuits. Hang polishers by their handles or store them in original cases—never coil the power cord tightly around the body, as this stresses internal connections.
Remove batteries from cordless models during storage to prevent parasitic drain and potential leakage. Store pads separately in sealed containers to prevent dust contamination. A dedicated storage cabinet or toolbox keeps everything organized and protected, ensuring your equipment is ready for flawless performance when you need it.
When to Service vs. Replace
Professional-grade polishers can last decades with proper maintenance, but there comes a point when repair costs exceed replacement value. If speed control becomes erratic, the polisher vibrates excessively despite balanced pads, or the motor struggles under light loads, it’s time for professional service. Most manufacturers offer flat-rate repair services that are cost-effective for high-quality tools.
Consider replacement when your polisher lacks modern features like electronic feedback control or vibration reduction that significantly impact finish quality. While the old workhorse might still run, newer technology might save you hours of work and produce better results. For professionals, the ROI on upgraded equipment often justifies replacement every 3-5 years as technology advances.
Budget Considerations
Entry-Level Options for Beginners
Quality variable speed polishers start around $100-150 for entry-level DA models. These tools offer adequate performance for occasional use and learning proper technique. While they may lack advanced features like electronic feedback or premium ergonomics, they provide the essential variable speed control needed for hologram prevention. Expect shorter lifespans and potentially less consistent speed under load.
Entry-level tools are ideal for beginners because they force you to develop good technique rather than relying on technology to compensate. The key is choosing a model with a reliable speed dial and decent motor—avoid ultra-cheap options under $75 that use inferior components and lack proper speed control. These budget tools can produce professional results in skilled hands.
Professional-Grade Investment
Professional polishers range from $250-400 and offer features that directly impact finish quality: electronic feedback control, superior ergonomics, vibration reduction, and robust construction. These tools maintain consistent speed under varying loads, provide smoother operation for better technique, and withstand daily use. The investment pays off in reduced fatigue, faster correction times, and consistently better finishes.
For business use, professional tools are tax-deductible and typically offer better warranty support. The cost difference is often recovered in one or two jobs through time savings and reduced rework. When your reputation depends on flawless, hologram-free finishes, the precision and reliability of professional-grade equipment is non-negotiable.
Cost of Ownership Over Time
Factor in accessories when budgeting: backing plates ($20-40), pad sets ($50-100 for a complete range), quality extension cords ($30-50), and maintenance supplies. These ancillary costs often exceed the polisher itself but are essential for achieving professional results. A $150 polisher with $200 in quality accessories outperforms a $300 polisher with cheap pads.
Consider consumable costs too. Pads wear out every 20-30 vehicles, backing plates last 1-2 years with heavy use, and brushes need replacement periodically. Budget approximately $200-300 annually for consumables if you’re polishing regularly. This ongoing investment in quality supplies directly correlates to the quality of finishes you can achieve.
Warranty and Support Value
A solid warranty indicates manufacturer confidence and protects your investment. Look for 1-3 year warranties that cover defects and motor issues. More importantly, consider the availability of service centers and parts. A great warranty is useless if you have to ship your tool cross-country and wait weeks for repair.
Premium brands often offer loaner programs or expedited service for professionals, minimizing downtime. Read warranty terms carefully—some exclude commercial use or require registration within 30 days. For hobbyists, standard warranties suffice. For professionals, prioritize brands with proven service networks and responsive customer support.
Frequently Asked Questions
What speed should I use to avoid holograms when polishing?
Start with low speeds (1,500-2,500 OPM) for spreading product and finishing, medium speeds (2,500-4,000 OPM) for general correction, and only use high speeds (4,000-6,000 OPM) for severe defects or final jeweling. Always finish each section with a low-speed pass to ensure complete abrasive breakdown and maximum gloss.
Can a dual-action polisher still create holograms?
While rare, DA polishers can create holograms if used incorrectly—typically from excessive speed, contaminated pads, or working on extremely soft paints. The orbital action provides a safety net, but technique still matters. Always use clean pads, appropriate speeds, and proper pressure to eliminate this risk.
How do I know if my polisher’s speed control is working properly?
Test by running the polisher at a set speed while pressing down on the pad. You should hear the motor maintain consistent sound and RPMs. If speed drops significantly or the motor strains, the electronic feedback system may be failing. Erratic speed changes during normal operation also indicate control issues.
What’s the difference between OPM and RPM in polisher specifications?
OPM (Orbits Per Minute) measures the orbital motion of DA polishers, while RPM (Revolutions Per Minute) measures the spinning motion of rotary polishers. DA polishers list OPM because the backing plate both spins and orbits. Higher OPM doesn’t always mean more cutting power—throw distance and pad size also factor in.
Should I buy a rotary or DA polisher first?
Beginners should start with a DA polisher due to its safety margin and ease of use. Master paint correction with a DA before considering a rotary. Rotary polishers require extensive practice and have a steep learning curve, but offer unmatched power for severe defects. Most professionals own both and use them for different stages of correction.
How often should I clean my polishing pads during use?
Clean foam pads every 2-3 sections using a pad brush to remove spent product. For heavy cutting, clean after each section. Microfiber pads require cleaning more frequently—every section—to prevent fiber matting. Have multiple pads of each type and rotate through them, allowing used pads to cool and release product while you work with fresh ones.
Can I use the same polisher for sanding and polishing?
While technically possible, it’s not recommended. Sanding dust contaminates the polisher’s internals and can cause premature wear. Additionally, sanders typically lack the precise speed control needed for paint correction. Invest in separate tools for each task to maintain optimal performance and prevent cross-contamination that could cause defects.
What’s the ideal ambient temperature for polishing?
Work in temperatures between 60-80°F. Cold paint is hard and resists correction, requiring excessive speed and pressure that causes holograms. Hot paint softens and can be over-corrected or smeared. If working in heat, polish in early morning or evening, keep panels cool with occasional misting, and reduce speeds accordingly.
How long should I wait before polishing fresh paint?
Fresh paint needs 30-90 days to fully cure, depending on the paint system and environmental conditions. Polishing too early traps solvents and can cause permanent defects. Test cure by pressing your thumbnail into an inconspicuous area—if it leaves an impression, the paint is too soft. Always consult with your paint supplier for specific cure times.
Why do I still see holograms after polishing?
Residual holograms indicate incomplete correction. You may need to drop down to a finer polish and pad combination, reduce speed for final passes, or increase working time to allow complete abrasive breakdown. Sometimes holograms are simply leftover defects from previous stages that weren’t fully removed. Always inspect under multiple light sources and be prepared to repeat refinement stages until the finish is perfect.
See Also
- How to Solve Hologram Finish with the 10 Best Variable Speed Polishers in 2026
- Stop Overheating Paint with the 10 Best Heat-Resistant Polishers This Year
- How to Solve Buffer Burns with the 10 Best Variable Speed Polishers in 2026
- Stop Overheating with the 10 Best Corded Polishers This Year
- How to Solve Hologram Marks with the 10 Best Variable Speed Polishers in 2026